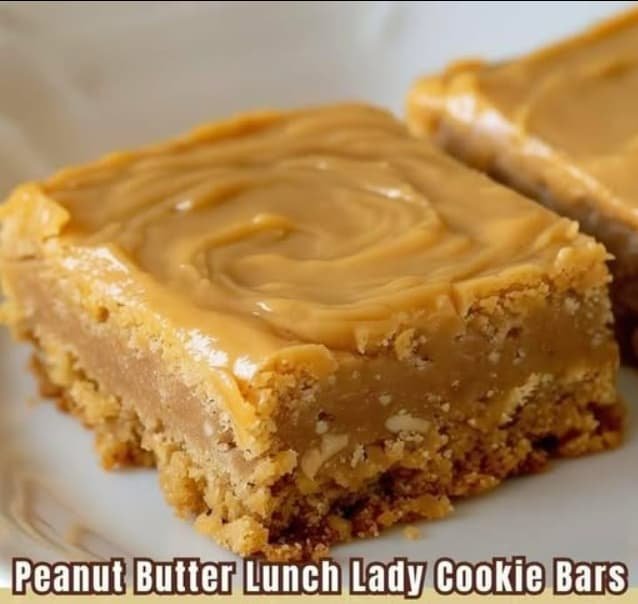
There’s something deeply powerful about a recipe that can instantly transport you back to childhood with just one bite, and these Peanut Butter Lunch Lady Cookie Bars do exactly that with their perfect combination of chewy texture and rich peanut butter frosting. This recipe represents a piece of American school cafeteria history—those magical bars that made lunch period something to look forward to, created by resourceful lunch ladies who knew how to stretch simple ingredients into something that would make hundreds of kids smile. I first encountered the legend of these bars through online recipe communities where people shared memories of their elementary school cafeterias, and after recreating them in my own kitchen, I understood why they’ve become such a beloved throwback treat that bridges generations.
Why You’ll Love These Peanut Butter Lunch Lady Cookie Bars
- Pure nostalgic comfort – Captures the exact flavor and texture of beloved school cafeteria memories
- Simple pantry ingredients – Uses basic staples to create something extraordinary
- Perfect sweet and salty balance – Rich peanut butter paired with sweet frosting hits every craving
- Feeds a crowd beautifully – One batch creates enough bars for parties, potlucks, or family gatherings
- Foolproof technique – Nearly impossible to mess up, perfect for bakers of any skill level
- Highly customizable – Easy to adapt with different add-ins and flavor variations
Ingredients You’ll Need
For the Cookie Bar Base:
- 2 cups all-purpose flour – Creates the perfect chewy structure
- 2 cups granulated sugar – Sweetens and helps create tender texture
- 1½ cups creamy peanut butter – The star flavor that defines these bars
- 3 sticks (1½ cups) unsalted butter – Creates rich, tender crumb
- 1 teaspoon baking soda – Provides gentle lift and texture
- 1 teaspoon vanilla extract – Enhances all the flavors
- 1 teaspoon salt – Balances sweetness and intensifies peanut butter
- 2 large eggs – Adds structure and richness
- ½ cup whole milk – Creates moisture and helps bind ingredients
For the Classic Peanut Butter Frosting:
- 4 cups powdered sugar – Creates smooth, sweet frosting base
- ½ cup creamy peanut butter – Continues the peanut butter theme
- 4 tablespoons unsalted butter – Adds richness and helps create spreading consistency
- ¼ cup whole milk – Thins frosting to perfect consistency
Step-by-Step Instructions
Prepare for Baking:
Step 1: Preheat and Prep Preheat oven to 400°F and generously grease a large 10×15 inch jelly roll pan or cookie sheet. Line with parchment paper for easiest removal.
Create the Bar Base:
Step 2: Mix Dry Ingredients In a large bowl, whisk together flour, sugar, baking soda, and salt until well combined.
Step 3: Prepare Wet Ingredients In a separate bowl, whisk together milk, eggs, and vanilla extract until smooth.
Step 4: Melt Peanut Butter Mixture In a saucepan over medium heat, melt butter and peanut butter together, stirring until smooth and fully combined. Remove from heat and let cool slightly.
Step 5: Combine Everything Pour the melted peanut butter mixture into the dry ingredients, stirring until mostly combined. Add the egg mixture and mix until batter is smooth and evenly incorporated.
Bake to Perfect Texture:
Step 6: Spread and Bake Spread batter evenly in prepared pan, using a spatula to smooth the top. Bake for 20 minutes until edges are golden brown and a toothpick inserted in center comes out clean.
Step 7: Cool Completely Let bars cool completely in the pan before frosting—this prevents the frosting from melting and becoming runny.
Make the Signature Frosting:
Step 8: Create Frosting Base In a small saucepan, melt butter and peanut butter together until smooth. Stir in milk until well combined.
Step 9: Add Powdered Sugar Remove from heat and gradually whisk in powdered sugar until frosting is smooth and creamy with perfect spreading consistency.
Final Assembly:
Step 10: Frost the Bars Pour warm frosting over cooled cookie bars, using a spatula to spread evenly to all edges.
Step 11: Set and Slice Allow frosting to set for 20-30 minutes before cutting into squares or rectangles and serving.
Serving Suggestions and Pairings
Perfect Occasions These nostalgic bars work beautifully for various settings:
- School events and bake sales – Guaranteed to be the first treats to disappear
- Potluck gatherings – Feeds a crowd and travels well
- Family reunions – Appeals to all generations with familiar flavors
- Casual entertaining – Easy to serve and universally loved
Classic Pairings Serve with cold milk for the ultimate nostalgic experience, or pair with coffee for adult appreciation of childhood flavors.
Make-Ahead Tips
Perfect for Planning These bars are designed for advance preparation:
Full Make-Ahead Bars can be made completely and stored covered at room temperature for up to 4 days, making them perfect for planned events.
Freezing Success Freeze frosted or unfrosted bars wrapped tightly for up to 2 months. Thaw at room temperature before serving.
Component Prep Mix dry ingredients and prepare frosting components ahead, then combine and bake when needed.
Storage and Leftovers
Keeping Them Fresh Store in airtight containers at room temperature for up to 4 days. Layer parchment between stacked bars to prevent sticking.
Texture Maintenance These bars actually improve slightly after sitting, as flavors meld and the texture becomes even more perfectly chewy.
Portion Planning One batch creates approximately 24 generous bars, perfect for sharing or storing for later enjoyment.
Custom Variations and Add-Ons
1. Chocolate Peanut Butter Bars Stir chocolate chips into batter or top with chocolate ganache instead of peanut butter frosting.
2. Peanut Butter and Jelly Style Swirl grape jelly or strawberry jam into the batter before baking for classic PB&J flavors.
3. Crunchy Addition Add chopped peanuts, pretzels, or toffee bits to the batter for extra texture and interest.
4. Salted Caramel Twist Drizzle caramel sauce over frosted bars and sprinkle with sea salt flakes.
5. Gluten-Free Version Substitute with 1:1 gluten-free flour blend for those avoiding gluten.
Nutrition Information
Per bar (based on 24 servings):
- Calories: ~285
- Fat: 14g
- Protein: 6g
- Carbohydrates: 38g
- Fiber: 2g
- Sugar: 32g
Peanut Butter Lunch Lady Cookie Bars FAQs
Why are they called “Lunch Lady” bars? These bars were popularized in school cafeterias by lunch ladies who perfected this recipe to feed hundreds of students with simple, affordable ingredients.
Can I use natural peanut butter? Regular creamy peanut butter works best for texture and consistency. Natural peanut butter may make the bars more crumbly.
How do I get clean cuts? Make sure bars are completely cool before cutting, use a sharp knife, and wipe between cuts for the neatest presentation.
Can I halve this recipe? Yes, use a 9×13 pan and reduce baking time to 15-18 minutes, checking for doneness with a toothpick.
What if my frosting is too thick or thin? Add milk gradually if too thick, or more powdered sugar if too thin, until you reach perfect spreading consistency.
Final Thoughts: Share the Love!
These Peanut Butter Lunch Lady Cookie Bars represent more than just a dessert—they’re a connection to shared American childhood experiences and the power of simple ingredients transformed by caring hands. They prove that some of the most beloved recipes come from institutional kitchens where resourceful cooks knew how to create joy on a budget. Whether you’re reliving your own school memories, introducing a new generation to these classic flavors, or simply wanting to create something that brings people together around familiar comfort, these bars deliver that perfect combination of nostalgia and satisfaction that makes every bite feel like coming home.