Prep Time: 15 minutes | Cook Time: 10 minutes | Rest Time: 24 hours | Total Time: 24 hours 25 minutes | Makes: About 1 cup

Why This Peri Peri Sauce Will Revolutionize Your Condiment Game
There’s something absolutely electrifying about a perfectly crafted peri peri sauce that goes far beyond simple heat. This isn’t just another hot sauce – it’s a complex symphony of flavors that captures the essence of Portuguese and African culinary traditions in one intensely flavorful condiment. The magic of authentic peri peri sauce lies in its ability to deliver serious heat while maintaining incredible depth and balance that enhances rather than overwhelms food.
What makes this peri peri sauce so extraordinary is how it captures the unique character of the African bird’s eye chili (piri-piri) while building layers of flavor through garlic, citrus, and aromatic herbs. Unlike many commercial hot sauces that rely solely on heat, traditional peri peri sauce offers complexity – the initial fruity sweetness of the chilies, followed by building heat, with underlying notes of garlic, herbs, and bright acidity that keeps you coming back for more.
I first encountered authentic peri peri sauce during a trip to Lisbon, where I watched a Portuguese grandmother prepare it using techniques passed down through generations. Her hands moved with the confidence of someone who had made this sauce countless times, adjusting heat and acid by instinct rather than measurement. That experience taught me that great peri peri sauce isn’t just about following a recipe – it’s about understanding the balance of flavors that makes this condiment so addictive.
The beauty of homemade peri peri sauce lies in its incredible versatility and the way it improves with time. While store-bought versions can be harsh and one-dimensional, properly made peri peri sauce develops complexity and mellows beautifully, becoming more nuanced and flavorful with each passing day. This isn’t a sauce you use once and forget – it becomes an essential component of your cooking arsenal.
Ingredients
For the Chili Base:
- 12-15 fresh red bird’s eye chilies (piri-piri peppers preferred)
- 6 dried red chilies (cayenne or pequin work well)
- 2 tablespoons hot water (for soaking dried chilies)
For the Aromatic Foundation:
- 6 large cloves garlic, roughly chopped
- 1 large red bell pepper, roasted and peeled
- 1 medium red onion, roughly chopped
- 2 bay leaves
- 1 teaspoon smoked paprika
For the Acid and Oil Base:
- ⅓ cup fresh lemon juice (from 2-3 lemons)
- 2 tablespoons red wine vinegar
- ½ cup extra virgin olive oil
- 2 tablespoons tomato paste
For the Seasoning Blend:
- 2 teaspoons coarse sea salt
- 1 teaspoon black peppercorns, freshly cracked
- 1 teaspoon dried oregano
- ½ teaspoon ground ginger
- ¼ teaspoon ground cardamom
For Finishing:
- 2 tablespoons fresh parsley, chopped
- 1 tablespoon fresh basil, chopped
- Additional olive oil for storage
The Art of Authentic Peri Peri Sauce: Understanding the Foundation
Selecting the Right Chilies for Maximum Impact
The heart of exceptional peri peri sauce lies in choosing the right chilies to create the perfect balance of heat and flavor. Traditional piri-piri peppers (also called African bird’s eye chilies) are the gold standard for authentic peri peri sauce, offering intense heat combined with a distinctive fruity flavor that sets this sauce apart from other hot sauces.
If you can’t find authentic piri-piri peppers for your peri peri sauce, Thai bird’s eye chilies or serrano peppers make excellent substitutes. The key is using peppers that provide substantial heat (50,000-100,000 Scoville units) while maintaining some fruit-forward flavor notes that balance the intensity.
The combination of fresh and dried chilies in peri peri sauce creates complexity that single-type preparations can’t match. Fresh chilies provide bright, immediate heat and fruity notes, while dried chilies contribute deeper, more concentrated flavors and subtle smokiness that gives authentic peri peri sauce its characteristic depth.
Building Layers of Flavor Beyond Heat
Great peri peri sauce is never just about burning your tongue – it’s about creating a condiment that enhances and elevates food. The roasted red bell pepper in this recipe provides natural sweetness and body that balances the aggressive heat while contributing gorgeous color and subtle smokiness.
Garlic plays a crucial role in peri peri sauce, providing aromatic depth and a slight sharpness that complements the chilies beautifully. Use fresh, firm garlic cloves and don’t be tempted to reduce the amount – the long blending process mellows the garlic while distributing its flavor throughout the sauce.
The herbs and spices in peri peri sauce aren’t random additions – they’re carefully chosen to complement the Portuguese and African heritage of the recipe. Oregano provides earthy, Mediterranean notes, while ginger and cardamom add warmth and complexity that reflects the African influence on traditional peri peri sauce.
Understanding the Critical Role of Acid and Oil
The balance of acid and oil in peri peri sauce serves both flavor and preservation functions. Fresh lemon juice provides bright acidity that cuts through rich foods and helps preserve the sauce naturally, while red wine vinegar adds depth and complexity that develops over time.
Quality olive oil is essential for authentic peri peri sauce – it carries flavors, provides mouthfeel, and helps preserve the sauce while adding its own fruity, peppery notes. Don’t skimp on olive oil quality, as it significantly impacts the final flavor of your peri peri sauce.
Step-by-Step Instructions for Peri Peri Sauce Mastery
Step 1: Prepare the Chili Foundation with Proper Technique
Begin your peri peri sauce by soaking the dried chilies in hot water for 15 minutes until they’re completely softened. This rehydration process is crucial for creating smooth texture and extracting maximum flavor from the dried peppers.
While the dried chilies soak, prepare the fresh chilies by removing stems but leaving seeds intact – the seeds contribute significantly to both heat and flavor in authentic peri peri sauce. If you prefer milder heat, you can remove some seeds, but remember that traditional peri peri sauce is meant to be fiery.
Drain the soaked dried chilies, reserving the soaking liquid. This chile-infused water contains concentrated flavors and can be used to adjust the consistency of your finished peri peri sauce.
Step 2: Roast the Bell Pepper for Smoky Depth
Place the red bell pepper directly over an open flame or under a broiler, turning frequently until the skin is completely charred and blackened all over. This charring process is essential for authentic peri peri sauce flavor – it adds smokiness and concentrates the pepper’s natural sweetness.
Place the charred pepper in a bowl and cover tightly with plastic wrap, allowing it to steam for 10 minutes. This steaming loosens the charred skin, making it easy to peel away. Remove all the blackened skin, seeds, and stem, leaving only the sweet, smoky flesh for your peri peri sauce.
Cut the roasted pepper into rough chunks – don’t worry about precise cuts since everything will be blended smooth, but uniform pieces help ensure even processing in your peri peri sauce.
Step 3: Build the Aromatic Base
Heat 2 tablespoons of the olive oil in a large skillet over medium heat. Add the chopped onion and cook for 5-7 minutes until softened and lightly caramelized. This cooking process sweetens the onion and removes any harsh raw flavors that could interfere with the balance of your peri sauce.
Add the chopped garlic, bay leaves, and smoked paprika to the skillet and cook for another 2-3 minutes until the garlic is fragrant and lightly golden. Be careful not to burn the garlic, as it will add unwanted bitterness to your peri peri sauce.
Remove the bay leaves and let the aromatic mixture cool slightly before proceeding with blending. The cooked aromatics provide a flavor foundation that raw ingredients simply can’t match in peri peri sauce.
Step 4: Master the Blending Process
Combine all the prepared chilies (fresh and rehydrated dried), roasted bell pepper, cooked onion and garlic mixture, tomato paste, lemon juice, and red wine vinegar in a high-powered blender or food processor. This is where your peri peri sauce truly comes together.
Blend on high speed for 2-3 minutes until the mixture is completely smooth and uniform. The goal is silky smoothness without any visible pieces – traditional peri sauce should have a consistent, pourable texture that coats food evenly.
While the blender is running, slowly drizzle in the remaining olive oil to create a proper emulsion. This technique ensures the oil is fully incorporated rather than separating from the other ingredients in your peri sauce.
Step 5: Season and Balance the Flavors
Add the salt, cracked black peppercorns, oregano, ginger, and cardamom to the blended mixture and pulse several times to incorporate the seasonings throughout your peri peri sauce. Taste carefully (remember, this is hot!) and adjust seasoning as needed.
The flavor at this stage should be intense and slightly harsh – this is normal for fresh peri sauce. The flavors will meld and mellow significantly during the resting period, developing the complex, balanced character that makes this sauce so special.
If the consistency seems too thick, add reserved chili soaking liquid one tablespoon at a time until you achieve the desired texture. Traditional peri sauce should be thick enough to cling to food but thin enough to drizzle and spread easily.
Step 6: Perfect the Aging Process
Transfer your freshly made peri sauce to clean glass jars or bottles, leaving about ½ inch of headspace. Top each jar with a thin layer of olive oil to prevent oxidation and help preserve the vibrant color of your peri peri sauce.
Refrigerate the peri sauce for at least 24 hours before using – this resting period is crucial for flavor development. During this time, the harsh edges mellow, the flavors integrate, and the sauce develops the complex character that makes homemade peri peri sauce so superior to commercial versions.
For optimal flavor, let your peri sauce age for 3-5 days before first use. The sauce will continue to improve for up to two weeks, developing deeper, more nuanced flavors that make each use better than the last.
Step 7: Final Preparation and Storage
Before first use, stir the fresh herbs (parsley and basil) into your aged peri sauce. These fresh herbs add brightness and color that complement the deeper flavors developed during aging.
Taste your finished peri peri sauce and make any final adjustments. You might want more lemon juice for brightness, more salt for intensity, or even a touch more olive oil for smoothness. Trust your palate – great peri peri sauce should balance heat, acid, and richness perfectly.
Pro Tips for Peri Peri Sauce Excellence
Heat Level Control: Start with fewer chilies if you’re heat-sensitive, as you can always make the next batch spicier. Remember that peri sauce heat builds over time and the full impact isn’t immediate.
Consistency Mastery: The perfect peri sauce should coat the back of a spoon but still drizzle easily. Adjust with olive oil (to thin) or tomato paste (to thicken) as needed.
Storage Wisdom: Properly stored peri peri sauce keeps for up to 6 months in the refrigerator. Always use clean utensils and maintain the protective oil layer on top.
Flavor Development: Your peri sauce will continue evolving for weeks. What seems too harsh initially will mellow into complex perfection with patience.
Creative Uses for Your Peri Peri Sauce
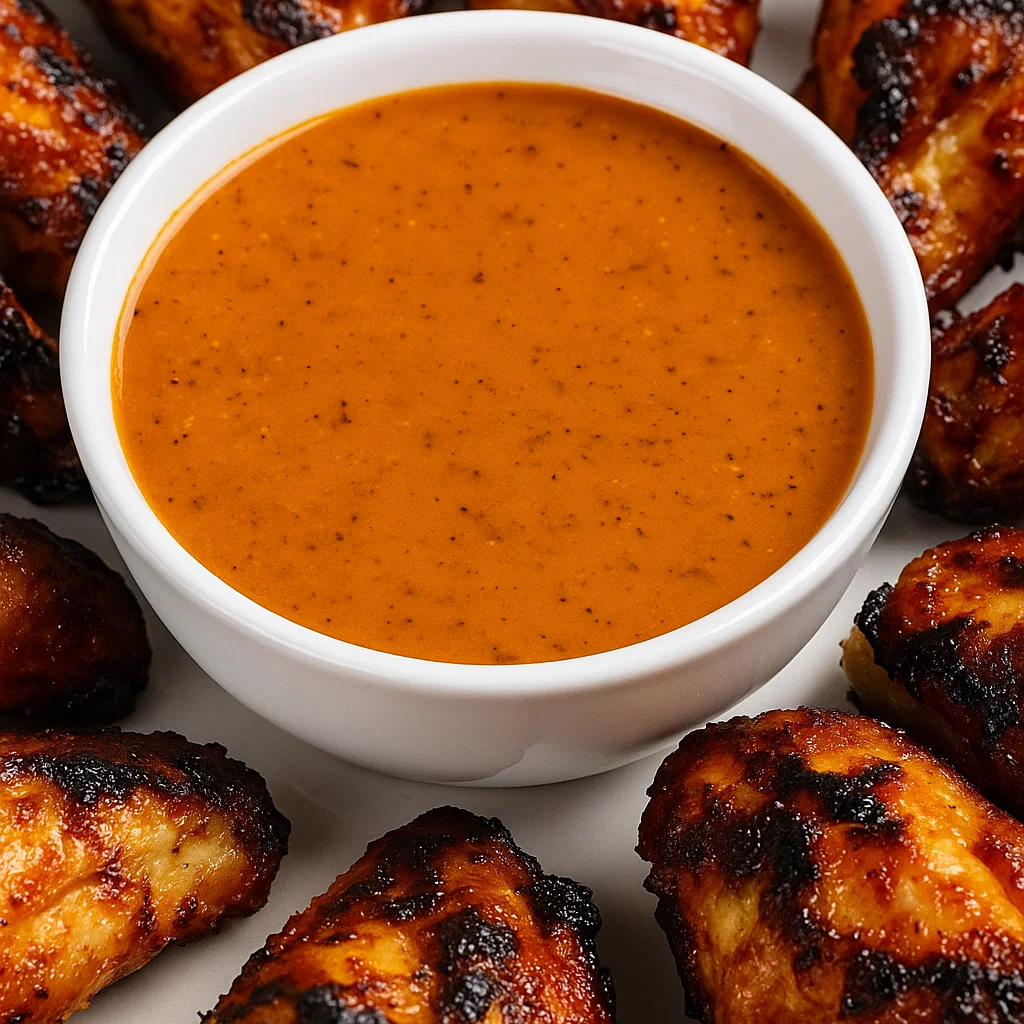
Portuguese Grilled Chicken: The classic application – marinate chicken in peri peri sauce for 4-24 hours before grilling for authentic Portuguese peri peri chicken that’s crispy outside and succulent inside.
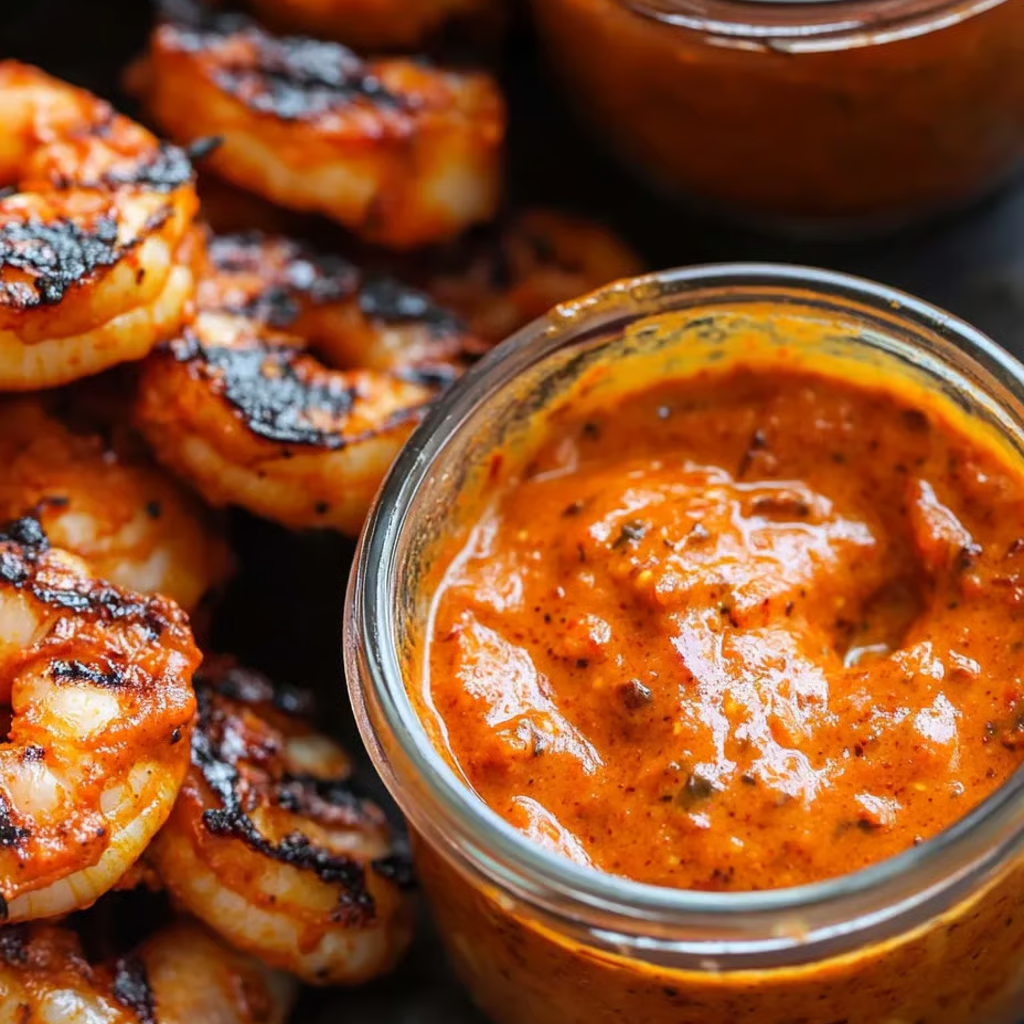
Seafood Enhancement: Drizzle peri sauce over grilled prawns, fish, or calamari for a Portuguese-inspired seafood feast that celebrates coastal flavors.
Vegetable Transformation: Toss roasted vegetables with peri peri sauce just before serving to add exciting heat and flavor to simple preparations.
Marinade Magic: Use peri peri sauce as a marinade for pork, lamb, or beef, adjusting the marinating time based on the meat’s thickness and your heat tolerance.
Condiment Excellence: Serve peri peri sauce alongside grilled meats, use as a dipping sauce for bread, or add to sandwiches and wraps for instant flavor enhancement.
Perfect Pairings: Complete Your Portuguese-Inspired Meal
This versatile peri peri sauce pairs beautifully with a wide range of foods, from traditional Portuguese dishes to modern fusion cuisine. Its bright acidity and complex heat make it particularly effective with rich, grilled foods.
Discover More Flavorful Recipe Collections
Ready to create the perfect meal around your homemade peri peri sauce? Explore these amazing recipe collections:
- Flavored Dips & Marinades – Find more bold sauces, marinades, and condiments that bring international flavors to your kitchen
- Hearty Main Dishes – Discover grilled chicken, seafood, and meat dishes that showcase peri peri sauce perfectly
- Perfect Sides – Explore Portuguese-inspired sides like roasted potatoes and grilled vegetables that complement spicy food
- Dinner Delights – Find complete dinner ideas that celebrate bold, international flavors
- Tasty Snacks – Discover appetizers and small plates that pair beautifully with spicy condiments
Traditional Portuguese Applications
In Portugal, peri peri sauce is most famously used with frango piri-piri (peri peri chicken), where chicken is marinated in the sauce before being grilled over charcoal. The high heat caramelizes the sauce while keeping the chicken moist and flavorful.
Portuguese cooks also use peri peri sauce with grilled sardines, prawns, and other seafood, taking advantage of the sauce’s ability to complement rather than overpower delicate flavors. The acidity in peri peri sauce helps cut through rich foods while the heat adds excitement without masking natural flavors.
For authentic Portuguese dining, serve peri peri sauce alongside crusty bread, olives, and grilled meats as part of a mezze-style spread that encourages sharing and conversation around the table.
Storage and Shelf Life
Store your homemade peri peri sauce in sterilized glass jars in the refrigerator for up to 6 months. The high acid content and olive oil create an environment that preserves the sauce naturally while allowing flavors to continue developing.
Always maintain the protective layer of olive oil on top of your peri peri sauce – this prevents oxidation and helps preserve both flavor and color. If the oil layer is disturbed, simply add a fresh tablespoon of olive oil after each use.
For longer storage, peri peri sauce can be frozen in ice cube trays for up to one year. This portion-control method allows you to thaw exactly the amount needed while maintaining peak flavor and texture.
The Cultural Heritage of Peri Peri Sauce
Understanding the rich cultural background of peri peri sauce adds depth to both the cooking and eating experience. This sauce represents the beautiful fusion of Portuguese colonial influence with African ingredients and techniques, creating something unique that belongs fully to both traditions.
The piri-piri chili that gives this sauce its name was brought to Portugal from Africa during the age of exploration, but it was African cooks who first developed the complex sauce preparations that Portuguese colonists learned and adapted. This cultural exchange created the peri peri sauce we know today.
In both Portugal and African countries like Mozambique and Angola, peri peri sauce represents more than just a condiment – it’s a symbol of cultural pride and a connection to ancestral cooking traditions that have survived and thrived across continents.
Health Benefits and Nutritional Value
Beyond its incredible flavor, peri peri sauce provides surprising health benefits from its concentrated ingredients. The chilies contain capsaicin, which has been linked to metabolism boosting, pain relief, and cardiovascular benefits.
Garlic contributes immune-supporting compounds, while the olive oil provides healthy monounsaturated fats and antioxidants. The fresh herbs add vitamins and minerals, making peri peri sauce a flavorful way to incorporate beneficial compounds into your diet.
The natural preservative properties of the acid and salt in peri peri sauce mean you can enjoy these health benefits without relying on artificial preservatives or additives found in many commercial hot sauces.
Troubleshooting Common Issues
Too Hot to Handle: If your peri peri sauce is overwhelmingly spicy, blend in additional roasted red pepper and olive oil to dilute the heat while maintaining flavor complexity.
Separation Issues: Oil separation is normal in homemade peri peri sauce. Simply stir before use, or blend briefly to re-emulsify if you prefer uniform consistency.
Bland Flavor: Insufficient salt is usually the culprit. Add salt gradually and let the sauce rest – the salt needs time to distribute and enhance all the other flavors in peri peri sauce.
Wrong Consistency: Too thick? Add lemon juice or olive oil. Too thin? Blend in more tomato paste or roasted red pepper until you achieve the perfect texture for your peri peri sauce.
Why Peri Peri Sauce Creates Culinary Magic
There’s something deeply satisfying about creating a condiment that transforms ordinary meals into extraordinary experiences. This peri peri sauce embodies the principle that great flavor comes from understanding and respecting traditional techniques while adapting them to modern kitchens and tastes.
The process of making authentic peri peri sauce – from charring peppers to balancing heat and acid to allowing time for flavors to develop – connects you to generations of cooks who understood that the best condiments require patience, technique, and respect for ingredients.
Whether you’re using this peri peri sauce to recreate traditional Portuguese dishes or discovering new ways to incorporate its complex heat into your cooking, you’re participating in a culinary tradition that celebrates bold flavors and the art of balance.
Ready to master this iconic Portuguese condiment? This authentic peri peri sauce is about to become your secret weapon for transforming ordinary meals into extraordinary flavor experiences.